The Best Fluffy Pancakes recipe you will fall in love with. Full of tips and tricks to help you make the best pancakes.


The aroma of hardwood smoke swirling around a well-marbled piece of beef is one of the most rewarding experiences in outdoor cooking. While brisket often steals the spotlight in the BBQ world, the smoked chuck roast recipe is a hidden gem that many pitmasters refer to as ‘Poor Man’s Brisket.’ This cut comes from the shoulder of the cow, a hardworking muscle group that is naturally rich in connective tissue and intramuscular fat. When treated with the low-and-slow method, those tough fibers transform into a buttery, succulent treat that rivals any high-end cut of meat.
Choosing a chuck roast for your smoker is an exercise in seeking balance. You want a roast with thick streaks of white fat running through the deep red muscle; this marbling is what will render down during the long hours on the grill, basting the meat from the inside out. Whether you are using a pellet grill smoked chuck roast method for its convenience and consistent temperature control, or an electric smoker chuck roast setup for its steady humidity, the fundamental principles remain the same. It is all about patience, temperature management, and a robust seasoning that creates that signature dark, crusty bark.
In this guide, we will dive deep into the nuances of achieving the perfect smoked chuck roast internal temp, ensuring that every slice is as tender as the last. We will explore the science of the ‘stall,’ the benefits of different wood types, and the essential role of a long rest period. By the time you pull your roast off the grates, you won’t just have a meal—you’ll have a masterpiece of smoke and salt. This recipe is designed to be approachable for the backyard enthusiast while delivering results that would make any professional BBQ joint proud. Get your wood pellets ready and your thermometer calibrated; it is time to master the art of the smoked chuck roast.
The Ultimate Smoked Chuck Roast Recipe (Poor Man’s Brisket)
Course: Main CourseCuisine: American BBQDifficulty: IntermediateServings
6-8 people
servingsPrep time
45
minutesCooking time
8
hoursCalories
415
kcalIngredients
1 unit Beef Chuck Roast (3-4 lbs)
3 tbsp Yellow Mustard (as a binder)
2 tbsp Kosher Salt
2 tbsp Coarse Ground Black Pepper
1 tbsp Garlic Powder
1 tbsp Onion Powder
1 tbsp Smoked Paprika
1/2 cup Beef Broth (for spritzing/wrapping)
Directions
- Begin by selecting a high-quality chuck roast, ideally with significant intramuscular fat (marbling). Place the roast on a clean cutting board and pat it completely dry with paper towels. While you don’t want to remove all the fat, use a sharp boning knife to trim away any thick, hard ‘fat caps’ or hanging pieces of silver skin that won’t render during the smoke. This ensures that your smoked chuck roast dry rub makes direct contact with the meat, allowing for better bark formation and flavor penetration throughout the long cooking process. If the roast is uneven in shape, you can tie it with butcher’s twine to ensure it cooks at a uniform rate.
- Apply a thin, even layer of yellow mustard or a light coating of olive oil across the entire surface of the roast to act as a binder. This won’t affect the final flavor but is essential for helping the spices stick. In a small bowl, combine your kosher salt, coarse black pepper, garlic powder, onion powder, and smoked paprika. Generously coat every side of the beef with this dry rub, pressing it into the meat with your hands. Don’t be afraid to go heavy; a thick piece of chuck needs a robust seasoning layer to stand up to 8 hours of smoke. Allow the seasoned meat to sit at room temperature for about 30–45 minutes while you prepare your smoker.
- Prepare your pellet grill or electric smoker for indirect cooking. For a pellet grill smoked chuck roast, fill the hopper with hardwood pellets like oak, hickory, or a pecan blend to complement the beef’s richness. Set the temperature to 225°F (107°C). If you are using an electric smoker chuck roast, ensure your water pan is full to help maintain a humid environment, which prevents the exterior from drying out too quickly. Once the smoker has stabilized at 225°F and is producing a clean, thin blue smoke, place the roast directly on the grill grates. Close the lid and resist the urge to peek for the first three hours.
- During the first phase of smoking, your goal is to develop a deep, dark ‘bark.’ Check the internal temperature after about 3 hours using a reliable meat thermometer. You are looking for the smoked chuck roast internal temp to reach somewhere between 150°F and 160°F. If the exterior looks dry, you can lightly spritz the meat with a 50/50 mixture of apple cider vinegar and water every hour. This moisture helps the smoke stick to the meat and keeps the surface from hardening into a ‘shell’ before the interior fat has a chance to render properly.
- Once the roast hits approximately 165°F, it will likely enter ‘the stall,’ a period where the temperature plateaus as moisture evaporates from the surface. At this stage, you have a choice: leave it unwrapped for a crunchier bark or wrap it to speed up the process. To wrap, lay out two long sheets of heavy-duty aluminum foil or peach butcher paper. Place the roast in the center, perhaps adding a few splashes of beef broth or a tablespoon of butter on top, and wrap it tightly. Return the wrapped roast to the smoker, ensuring the seam is facing down to trap the juices.
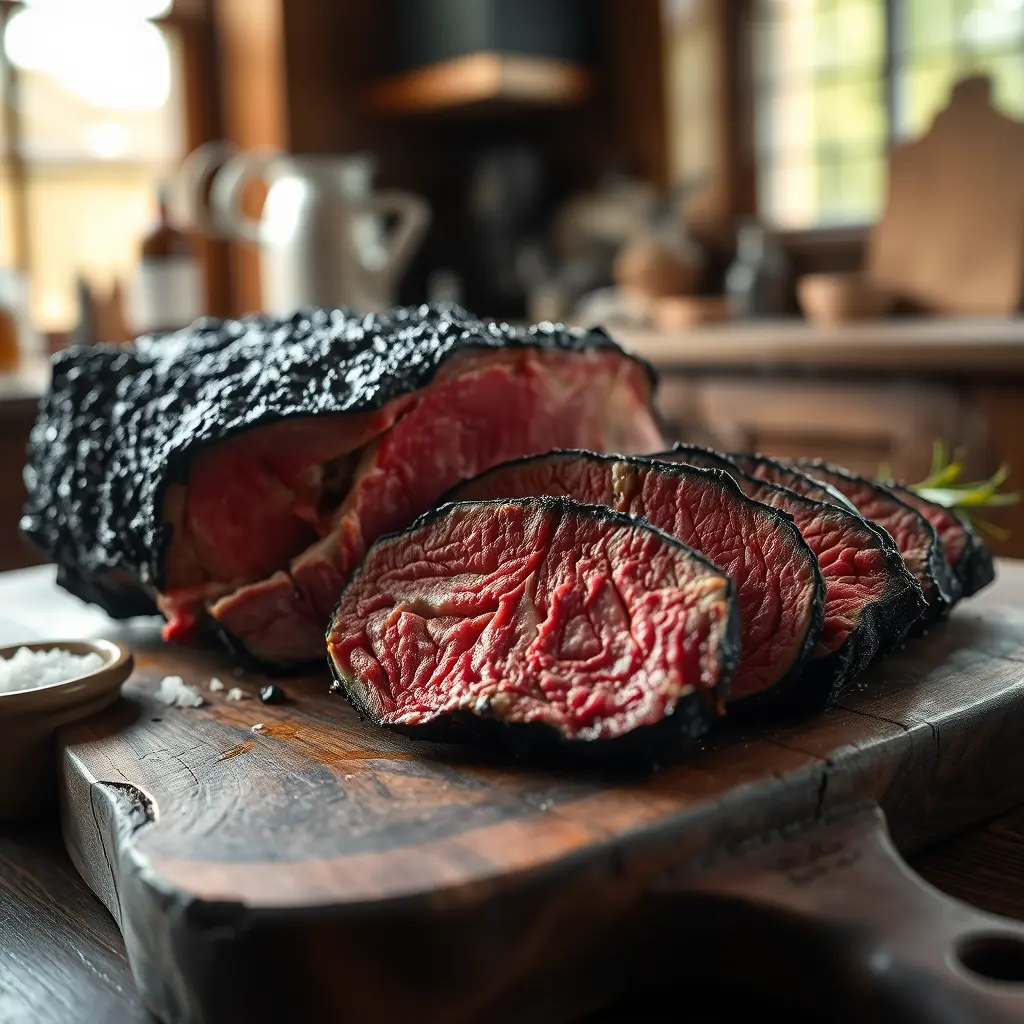
- Continue smoking the wrapped roast until the internal temperature reaches 200°F–205°F. However, don’t rely on the number alone; use a meat probe to check for ‘probe tenderness.’ The probe should slide into the thickest part of the meat with almost zero resistance, like a hot needle through softened butter. This usually takes an additional 2–3 hours after wrapping. If the meat still feels tough or ‘springy,’ it needs more time for the collagen to fully break down into gelatin. Patience at this stage is the difference between a tough roast and a melt-in-your-mouth masterpiece.
- Once the roast is probe-tender, remove it from the smoker. This is perhaps the most critical step: let the meat rest. Keep it wrapped and place it in a dry cooler or on a warm tray covered with towels for at least 60 to 90 minutes. This resting period allows the muscle fibers to relax and reabsorb the rendered fats and juices. If you slice it immediately, all that flavorful liquid will run out onto the cutting board, leaving you with dry meat. A long rest ensures every bite of your sliced smoked chuck roast is succulent and tender.
- When you are ready to serve, unwrap the roast and place it on a clean board. Note the direction of the muscle fibers; you want to produce a sliced smoked chuck roast by cutting against the grain. Use a long, sharp slicing knife to create 1/4-inch thick slices. Alternatively, if you cooked the roast closer to 205°F and it feels very soft, you can easily shred it for sandwiches or tacos. Serve immediately while warm, perhaps with a side of BBQ sauce or just as is to appreciate the pure, smoky beef flavor.
Notes
- For a deeper smoke ring, place the meat on the smoker while it is still cold from the refrigerator. Cold meat absorbs smoke more efficiently than room-temperature meat.
- If you are short on time, you can increase the smoker temperature to 250°F or 275°F after wrapping the roast. This is known as ‘hot and fast’ and can shave an hour off the total cook time without sacrificing much quality.
- Always use a high-quality, leave-in meat thermometer. Opening the lid to check the temperature causes a significant drop in heat, which can add 15-20 minutes to your cook time each time you do it.
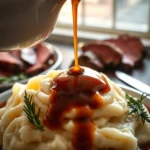
- Save the juices from the foil or butcher paper wrap! This ‘liquid gold’ can be poured back over the sliced meat or used to make a phenomenal smoky au jus.
Mastering a smoked chuck roast is a gateway into the broader world of low-and-slow barbecue, proving that you don’t always need a massive brisket to achieve competition-quality results at home. Whether you are serving this at a weekend family gathering or meal-prepping for the week ahead, the combination of a well-developed bark and a tender, juicy interior is always a winner. Remember that every smoker and every piece of meat is unique, so use your thermometer as your guide rather than strictly adhering to a clock.
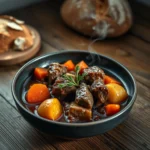
If you enjoyed this process, you might want to explore our best beef BBQ recipes guide for more inspiration on the grill. For those looking to elevate the leftovers, consider pairing your sliced beef with a rich topping using our best beef gravy recipe. The depth of flavor from the smoke makes for an incredible base for stews, sandwiches, and savory gravies alike.